本文编辑于 2023-09-15
作者:muyiacc
Github: https://github.com/muyiacc
CSDN: https://blog.csdn.net/muyiacc
Blog: https://www.seektao.cc/
使用环境:Debian11
1. 前言
在此之前,笔者使用过 Java 编写的 halo博客,这个博客很热门,但是它内存占用很大,
关于内存占用的情况:
-
配合使用MySQL数据库占用大概800M,一个MySQL 服务内存将近300M。可怕~~~~~~~~。
-
配合使用 Porstgresql 数据库占用550M内存左右,数据库占用内存大概有40M
这里插一句,Porstgresql最近也是如日中天的发展。强~
尽管如此,这对个人使用来说是不友好的,个人服务器资源宝贵,占用太多就不好安装其他服务了,所以需要替换。关于halo占用内存截图如下:

加上最近在学习Golang,这语言感觉确实强,占用内存极低,效率极高。
所以在GitHub上找到了一个开源,由Golang编写的博客系统 sonic,安装启动后查看只有50M不到的内存占用,顺道学习 Golang。
这个博客系统已经有 1.7K 的star了 ,应该还不错,今天拿来安装使用使用,接下来开始安装过程吧。
2. 搭建sonic
截止到笔者安装时期,最新版为1.1.1。
2.1. 下载
wget https://github.com/go-sonic/sonic/releases/download/v1.1.1/sonic-linux-amd64.zip
如果网络不通,请自寻解决办法~~
2.2. 解压
因为是zip格式,所以需要用 unzip解压,笔者一般接触的都是tar.gz格式,这里解压的时候有坑
这个坑为:unzip解压缩时会将压缩包的文件列表直接输出,不会自动创建以压缩包为名字的目录
# 解压命令为
mkdir ~/opt/sonic/ && unzip -d ~/opt/sonic/ sonic-linux-amd64.zip
unzip语法格式:
unzip [参数] 压缩包名
参数:
-d 路径 将压缩包的所有文件列表解压缩到指定路径,不会自动创建以目录
上述的路径请根据你自己的情况修改。
解压之后的文件列表为
conf  # 配置文件夹
resources  # 资源文件夹
sonic  # 程序执行入口
systemd # 提供的示例 systemd 服务文件,用于systemctl 启动程序
根据以上的目录,可以看出作者还有很有心的。
2.3. 启动
以下启动方式可任选其一
- 默认启动
如果你不想做任何修改,在解压的目录执行
./sonic -config conf/config.yaml
接着控制台会打印如下信息
Sonic started at         http://127.0.0.1:8080
Sonic admin started at         http://127.0.0.1:8080/admin
默认端口为 8080,通过浏览器,访问 ip:8080 即可
- 后台启动
nohup ./sonic -config conf/config.yaml &
到这一步默认就基本完成了。如果你想更加详细的了解sonic,请继续阅读
3. sonic的详细配置(可选)
3.1. conf
conf文件夹是启动的配置文件
内含两个yaml文件,一个是 config.dev.yaml 一个是 config.yaml
我们修改 config.yaml 即可。
查看内容,如图所示:
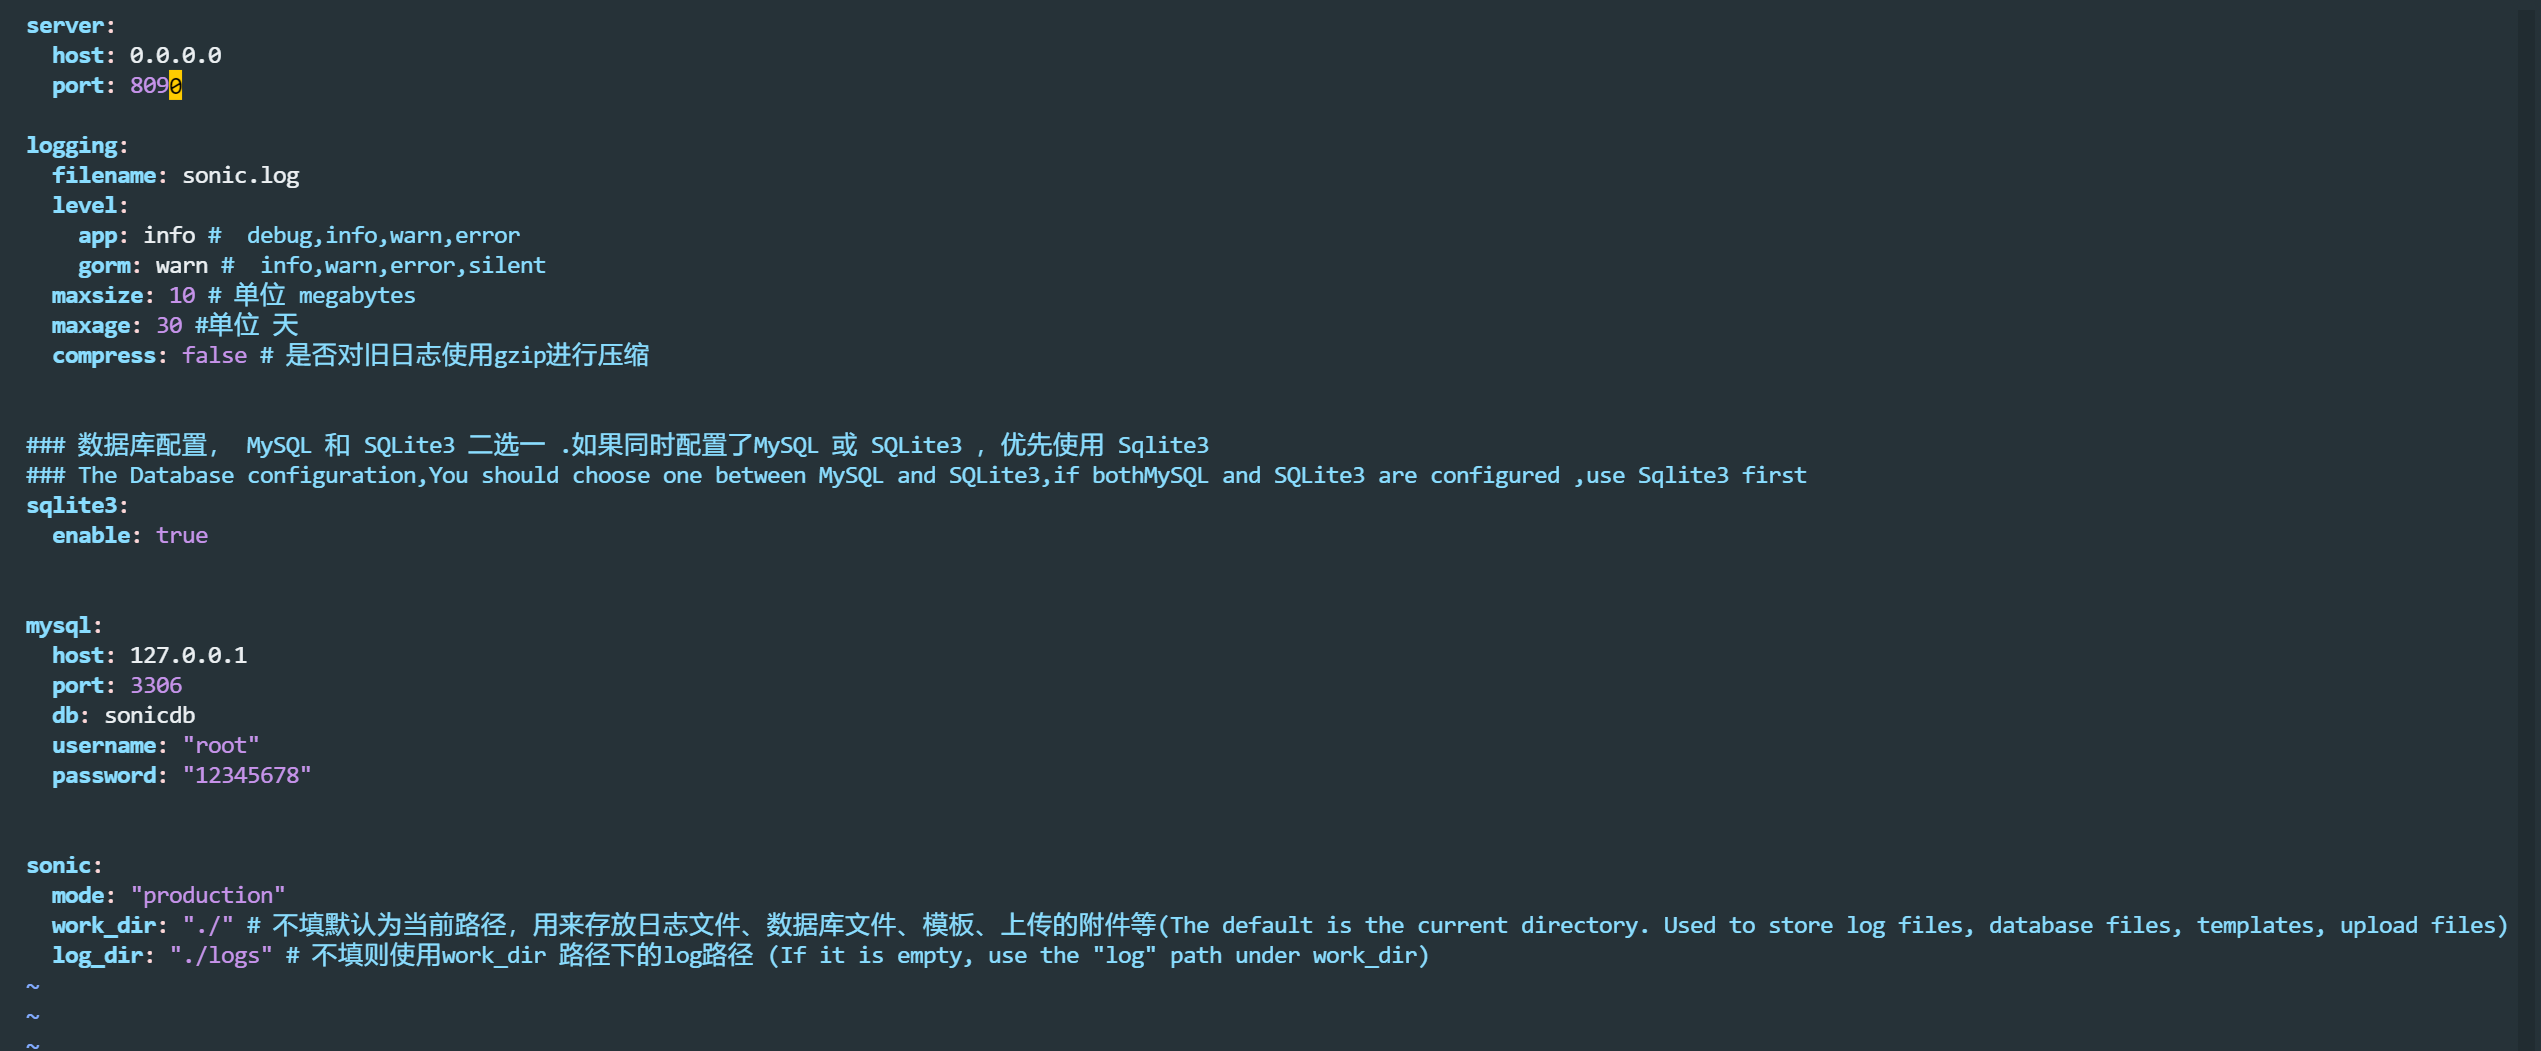
默认端口为8080,我已修改为8090,上述的配置都有中文说明,可根据情况进行修改。
3.2. resources
存放的前端ui相关的资源
如果你会前端,可自行编辑
3.3. sonic.db
数据库文件,sqlite3
3.4. systemd
systemd 服务脚本,可用于systemd 服务
编写systemd 服务,
目前有问题,建议使用后台启动,以下内容只做参考
在 systemd 目录下,有提供的sonic.service文件,我们对它稍作修改,
[Unit]
Description=Go-Sonic Service
Documentation=https://github.com/go-sonic/sonic
After=network.target nss-lookup.target

[Service]
User=nobody # 启动服务的用户名
ExecStart=/your_path/sonic  -config /your_path/conf/config.yaml # 启动程序的路径
Restart=on-failure
RestartPreventExitStatus=23

[Install]
WantedBy=multi-user.target%
笔者的配置
[Unit]
Description=Go-Sonic Service
Documentation=https://github.com/go-sonic/sonic
After=network.target nss-lookup.target

[Service]
User=ecs-user
ExecStart=/home/ecs-user/opt/sonic/sonic  -config /home/ecs-user/opt/sonic/conf/config.yaml
Restart=on-failure
RestartPreventExitStatus=23

[Install]
WantedBy=multi-user.target
接着复制到 /usr/lib/systemd/system 路径下
sudo cp sonic.service /usr/lib/systemd/system
启动服务
# systemctl服务
# 查看状态
systemctl status sonic
# 启动服务
sudo systemctl start sonic
# 停止服务
sudo systemctl stop sonic
# 开机自启
sudo systemctl enable sonic
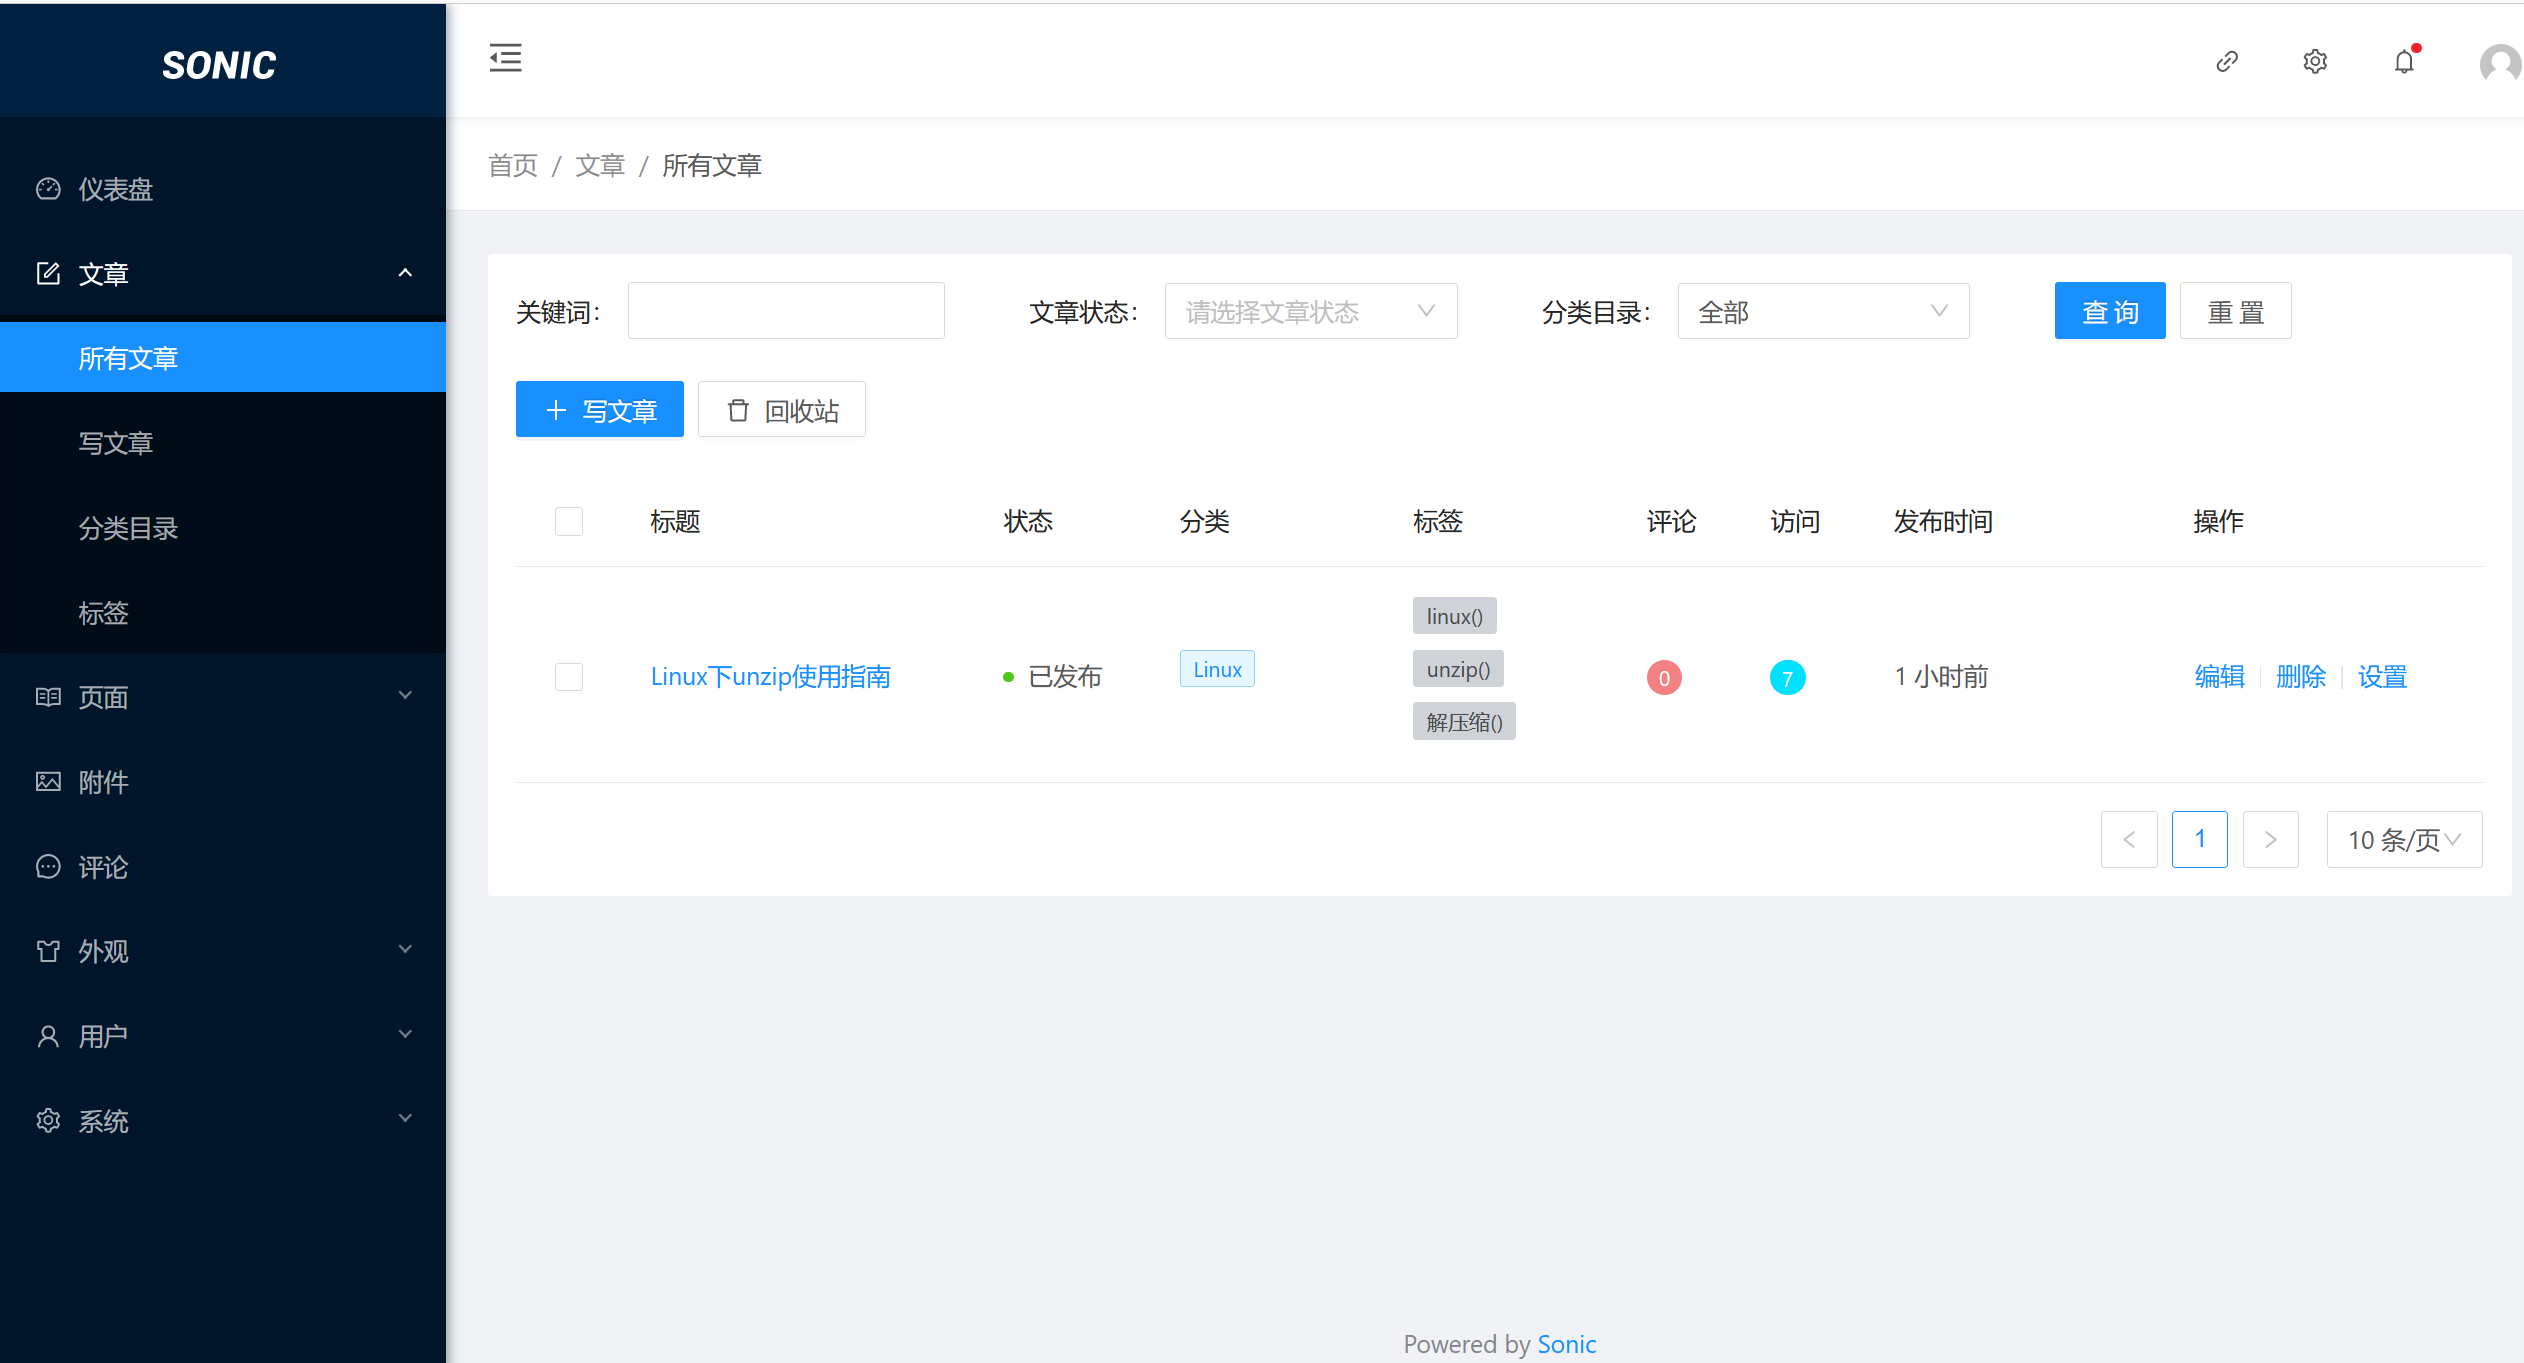
4. 使用截图
4.1. 主页

4.2. 后台
- 仪表盘

- 文章
5. 结语
写到这里,才发现和 halo后台如此相似,去看官网的 issues ,应该是从halo后台移植的,但是占据了Golang的优势,占用内存和使用效率却大大提高了,不得不说,Golang,确实强~~
分享到此结束。